

So, so, sew.
I think I have come up with another lovely little pattern. My hubby thinks it looks a bit old fashioned but I really like it with the little scallop detail around the edge.

Having drawn up quite a few Enid Gilchrist patterns of late I was inspired to make a pattern her style. So I got out my ruler and started measuring. Here is my Enid inspired tutorial for a size 4 scallop skirt.

Of course with Enid she expects you to understand her diagrams straight away but...
- You always start with the center line (11 inches).
- Next the top and bottom (12 inches and 17 inches). The center line should be at the middle of these lines (i.e. at 6 inches and 8.5 inches).
- Then the side lines which join your top and bottom lines (11 1/2 inches)
- Next measure the mid point between center lines and side lines at top and bottom. Draw through both these points starting at the top until 11 1/2 inches is reached (the orange lines)
- Extend the mid line to measure 11 1/2 inches.
- Mark the bottom of all 5 11 1/2 inch lines (the purple circles)
That completes the diagram and most of the pattern.

- Next I grabbed a bowl and joined the dots. If you wanted a deeper scallop you would use a smaller bowl.
- The only thing left on this piece is to to add a seam allowance. 1/2 an inch on all sides don't bother to do a scalloped bottom seam allowance just measure 1/2 an inch below the lowest scallop and draw a straight line.
I had two more pattern pieces.
- The lining.

Measure up 3 1/2 inches from the bottom of skirt pattern and either trace or fold original pattern when cutting. (the black line)
2. And the final piece is the waistband 25 inches by 2 1/2 inches.
And that is it.
Pattern drafting complete.

And now for the making.

I used 53cm of fabric 110cm wide. Cut 2 of each skirt and lining and 1 of waist band. You also need some ric rac and elastic for the waist either 1/4 or 1/2 inch wide.
Next sew and serge the side seams (1/2 inch seam allowance every where unless otherwise indicated.), turn skirt right side out and press side seams.
Sew and serge the lining side seams. Press seams. Serge around the top edge of lining.
Now comes the scallops. If you think you will not use the pattern again just cut around the scallops on the skirt pattern. If you want to keep the pattern complete you need to create a guide, just trace around the scallop shape and a little of the side seams on some tracing paper and cut out the scallops on this.


Pin the pattern to your lining remembering to leave 1/2 an inch of fabric below which is the seam allowance. You then draw around your pattern on the fabric with a removable fabric marker if you have one (or if you don't I just used a pen). Remember to do both sides of the lining.

Pin the lining inside out to the skirt (which is right side out.) matching side seams.

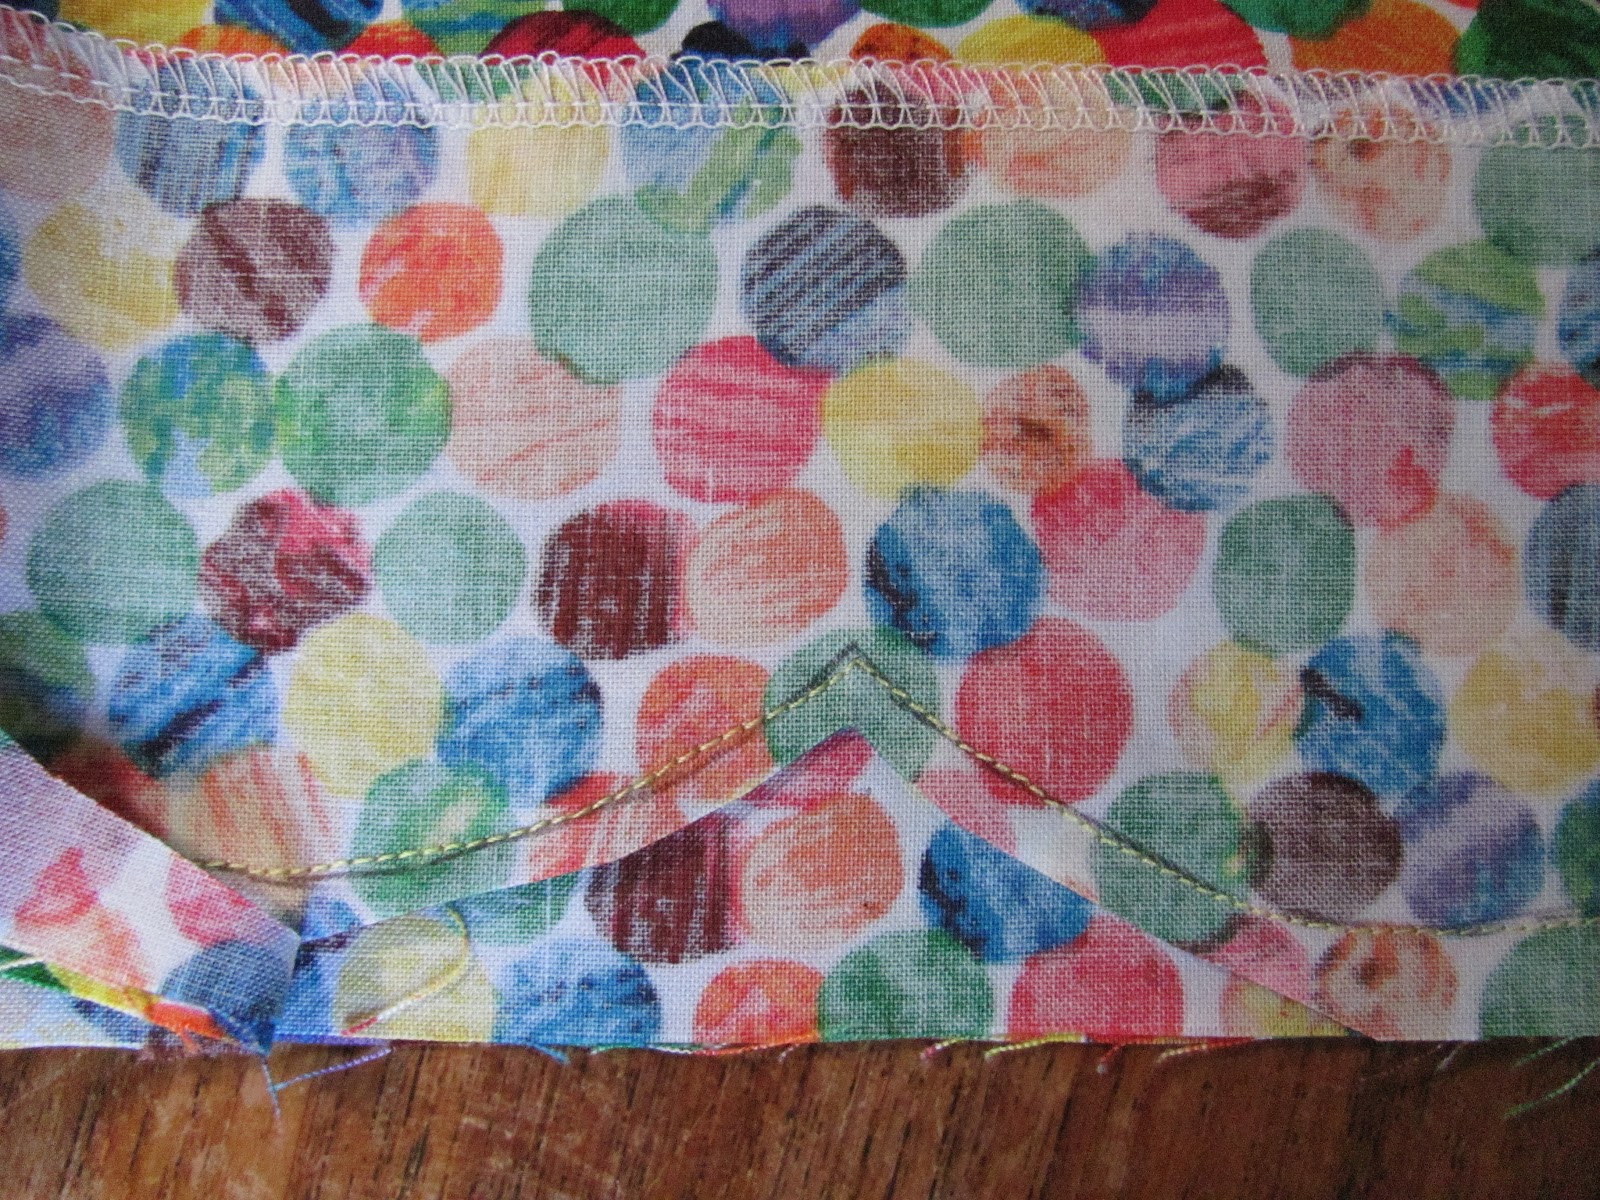
Sew through the two layers along the scallop line. Cut out with 1/4 inch allowance.
 Clip the curves especially important is the point where the scallops meet (for this snip go as close to the stitching as you can without cutting the seam). This will allow the curves to turn nicely.
Turn right side out and press.


Pin ric rac 2 inches up from the highest point of the scallop. Sew in place. This should secure the hem line.
All that is left now is the waist band.
Commence by sewing the smaller edge right side together to create a circle. Press seam allowance open. Press a 1/2 inch seam allowance around one edge of the waist band.
 Pin the right side of the unfolded egde of the waist band to the wrong side of the skirt. Sew. Press seam towards waist band.
 Fold band in half making sure 1st row of stitching is hidden behind the front 1/2 of the fabric. Sew close to the edge of the band leaving a 1 inch gap in which to insert the elastic.
You can fit 1/2 inch elastic but I only had 1/4 inch so I used that. If there is a waist handy it would be best to measure your recipient now if not my little girl used 17 inches. Thread the elastic through the casing. Join the elastic then sew over the 1 inch gap you left earlier.

And there we have a sweet scallop skirt.


Great tutorial Bella! You should submit this to Craft Gossip! Love that Eric Carle polka dot!
ReplyDeleteThanks Ros. She decided as soon as she got it on that she needed to go bug catching but we did not catch and very hungry caterpillars.
ReplyDeleteThat's just adorable! Thank you for sharing!
ReplyDeleteLove the scalloped edge!!! Cute little skirt and a fabulous tutorial. Thanks for sharing!
ReplyDeleteHi, I've featured your Scallop Skirt tutorial today...
ReplyDeletehttp://threadingmyway.blogspot.com/2012/05/threading-your-way-features_19.html
I've featured your Scallop Skirt in a round up of tutorials linked to 'Threading My Way'...
ReplyDeletehttp://threadingmyway.blogspot.com/2012/06/ten-terrific-free-skirt-tutorials.html
Love it!
ReplyDeleteGreat post. Looking forward to reading more. Thanks for taking the time to write this.
ReplyDeletecloud backup service
microsoft office 365 malaysia backup